Jr' High Playground Panorama
For this Panorama, I used the reception effect on Photoshop Elements 12. I like this one the best out of the three because I like how the play structure is there with the snow on the ground and the trees combining with the sky. It looks like its filtered but its not. The sky at the time I took this picture was pretty good and it added contrast to the picture. But what's disappointing is that, only two pictures worked when it was merged and I didn't like how the other Panorama categories merge the pictures. Only the reception effect worked for me.
Pictures I used to create this Panorama :
Dominion/Downing Street Panorama
For this Panorama I used the Spherical effect and It came out well when I filled in the sides it didn't have any imperfections. I just don't like how it looked tilted and the road kind of ruined the picture.
Pictures I used to create this Panorama :
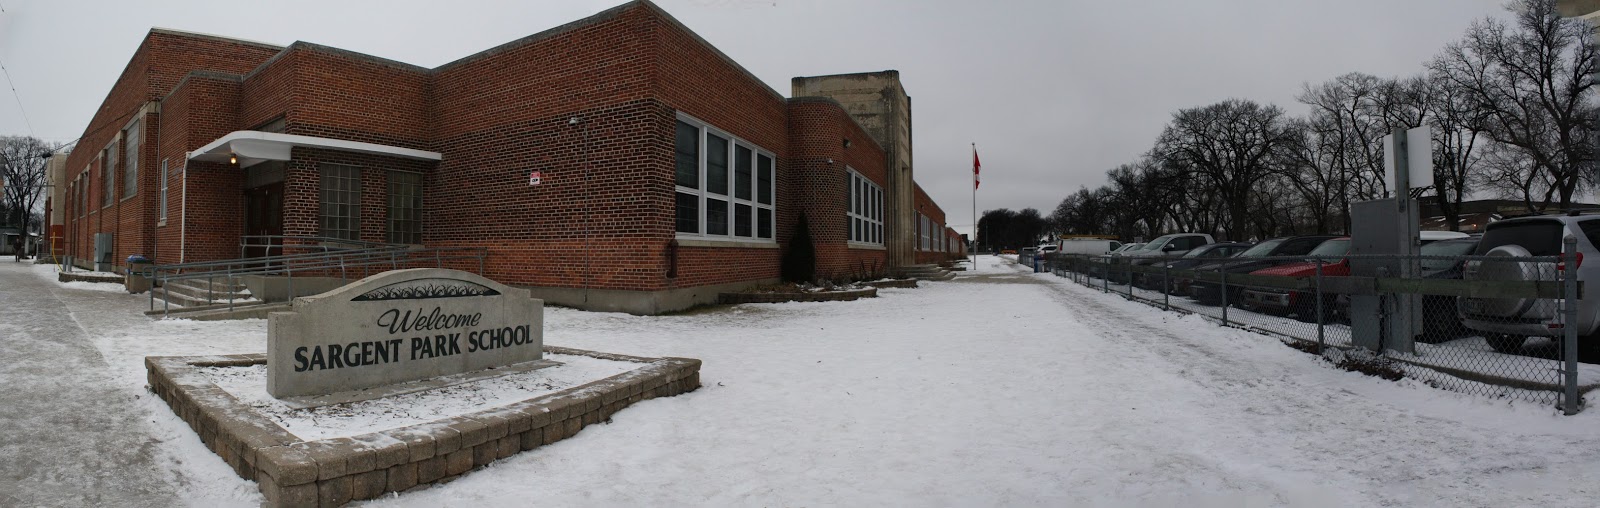
Sargent Park Panorama
(CYLINDRICAL)
(AUTO)
(SPHERICAL)
For this Panorama, I used three panorama categories. Cylindrical, Auto and Spherical. I don't think it made a lot of difference changing the effect. The only thing I think changed is the direction of the picture as you can see above, the spherical effect look much different than the auto and cylindrical one. The Sargent Park rock and the building look farther even though I cropped it to hide the bad stuff when it was filled in. While the auto effect looks like a normal panorama that you can do with your phone, it's lined up and the cylindrical one I don't really know how to explain it. It looks like it bulged up or it's like a spherical and auto effect combined. By the way I filled in all of it and it looks okay. I just had to crop the last one but just a little bit to remove the imperfections.
Pictures I used to create this Panorama :
Here's my Photomerge Scene Cleaner Assignment:
Here are the pictures I used:
For this assignment, the equipment that you will need are a camera and a tripod. To create this kind of photo, take 4-6 photos with models and for this one I have Charlene and Heart. Take multiple photos of them doing something, it wouldn't work if the models stays in the same shot, so they have to move.The background has to be the same and the lighting too. After taking photos, you proceed to merging the photos using the app called “Adobe Photoshop”. First off click open and pick the images you want to merge. After this, go “Enhance” and select the “Photomerge Scene Cleaner “. The pictures will load after you have selected them. Now Photomerge Scene Cleaner will have two boxes, the right one is for the one you're merging and the left side the one where your final product is. After merging your photos just click done and save and you're finally finished!
The story behind this picture is nothing fancy, it’s just getting together with someone you’re close with and being happy with each other. I took the pictures near Christmas holiday so I thought a christmas theme one!
Here is my photomerge scene cleaner assignment.
To make this image, first you had to take a bunch of pictures of a person in different positions. Make sure your camera is on a tripod so the shots are as still as possible. For this photo, Louanne was my model. I told her to go in a certain position and took a shot. I took about 10 different photos for me to choose from.
I edited this photo in Photoshop Elements and used the photomerge scene cleaner mode. It was pretty easy, but I had some difficulty sometimes editting the small details in this photo. For example, the colour of the floor and the lockers because blotches would appear as I editted the photo.
The pictue is showing a girl (Louanne) who's trying to get to the other side. But she can't do it by herself, so she needed a boost.
Here are some of the photo I used:


This is my Photomerge and Scene Cleaner Assignment.
To effortlessly take this type of imagery, you will need three things: a camera, a model or models, and a tripod—because trust me, no matter how hard you try, you can’t persistently stay still. Start off with your models trying different poses and facial expressions. Experiment with your model’s positioning to help convey your story. When taking your pictures, always consider if there had been any background changes in your photos that could impact your end result. Something as simple as a shadow or a slight shift to the left could easily disturb the alignment of your photos—making it more difficult to blend.
To merge your photos, you would use Adobe Photoshop Elements. From the three sections, you would choose “expert,” start off with opening your background picture. Then, click file, place, to insert your next picture. Once your picture is set and aligned, you can erase any unnecessary space. Continue the process until you are happy with your result. With my picture, I actually ended up selecting specific areas by using the lasso and magic wand icons. I wanted to experiment with exposure and brightness levels to create a fading effect.
The story I’m trying to convey is quite heart-rending. The story begins with a couple of best friends; two individuals who brings out each other’s best qualities. No matter the circumstances—you know, you always have someone to catch you when you fall. That person who will climb mountains, just to see you once again. However, when you thought to be at the peak, you were foolishly mistaken. Life is not a movie; you don’t always get happily ever afters. We make mistakes abundantly, such as trusting people too easily. That person who we always thought to be by our side won’t be there forever. There are factors in life that we can’t always control. That person who was once our best friend could instantly become another face in the crowd.
Photos I Used: